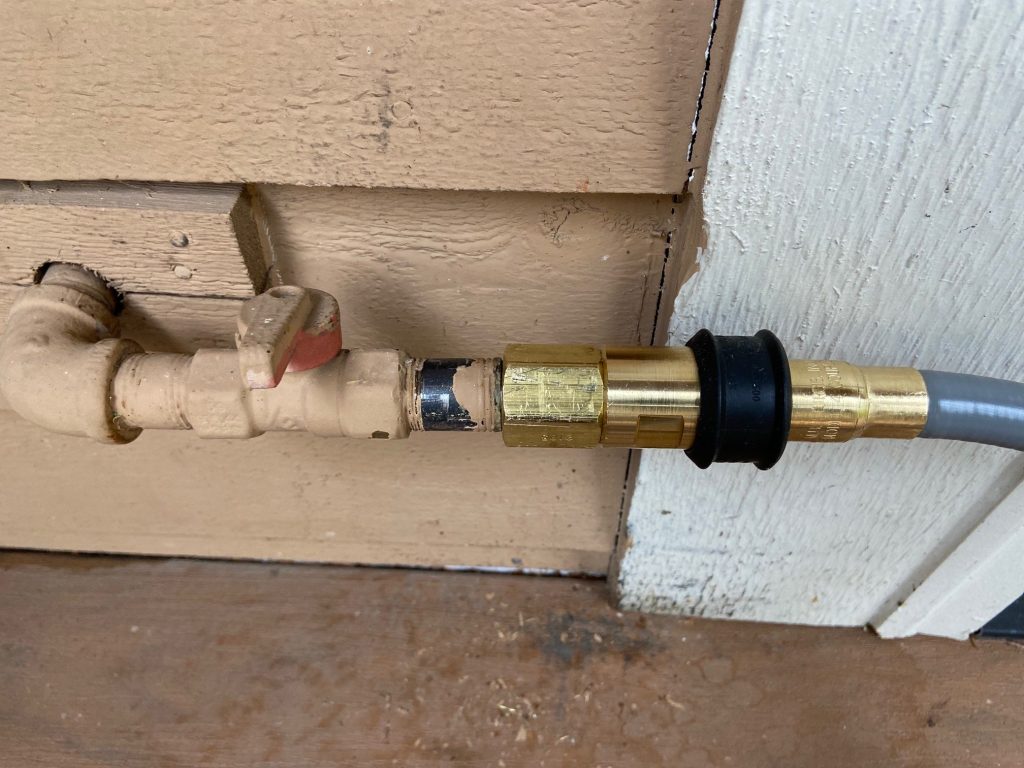
Looking to fire up your grill and enjoy some delicious barbecued food? If you’re wondering how to connect the gas line to your grill, look no further! In this article, we’ll walk you through the simple steps to help you get your grill up and running in no time. Whether you’re a grilling novice or a seasoned pro, mastering the art of connecting a gas line is essential for a successful grilling experience. So, let’s dive right in and discover how to connect a gas line to your grill effortlessly.
How to Connect a Gas Line to a Grill
Grilling is a popular and enjoyable way to cook delicious meals outdoors. If you own a gas grill, it’s essential to know how to connect the gas line properly to ensure safe and efficient operation. In this guide, we will walk you through the step-by-step process of connecting a gas line to your grill. Whether you’re a grilling novice or an experienced chef, this tutorial will provide you with the knowledge and confidence to connect your gas line with ease.
Gather the Required Tools and Materials
Before you begin connecting the gas line to your grill, it’s important to gather all the necessary tools and materials. Here’s a list of what you’ll need:
- Gas grill
- Gas supply line
- Adjustable wrench
- Gas leak detector solution or soapy water
- Gas shut-off valve
- Teflon tape or pipe joint compound
Ensure Safety First
Safety should always be your top priority when working with gas lines. Follow these precautions before starting the installation process:
- Read the manufacturer’s instructions: Familiarize yourself with the specific requirements and recommendations outlined by the grill manufacturer.
- Check for leaks: Before installation, perform a gas leak detection test on your existing gas line to ensure there are no leaks. Apply a gas leak detector solution or soapy water to the connections and look for any bubbles forming, indicating a leak. If you detect a leak, turn off the gas supply and address the issue before proceeding.
- Locate the gas shut-off valve: Locate the gas shut-off valve near your gas meter or propane tank. Ensure it is accessible and in working condition.
- Choose a suitable location: Select a safe and well-ventilated area for your grill. Keep it away from combustible materials and at least 10 feet away from any building structure.
Step-by-Step Guide to Connecting the Gas Line
Now that you have the necessary tools and have taken the safety precautions, let’s go through the step-by-step process of connecting the gas line to your grill:
Step 1: Prepare the Grill
- Make sure your grill is turned off and any propane tanks or natural gas sources are disconnected.
- Remove the cooking grates and heat deflectors to access the gas connection area.
- Inspect the burner tubes and ensure they are clean and free from any blockages.
Step 2: Attach the Gas Supply Line
- Inspect the gas supply line and ensure it is in good condition without any signs of damage.
- Apply Teflon tape or pipe joint compound to the threads of the gas supply line. This helps create a tight seal and prevent gas leaks.
- Screw the threaded end of the gas supply line onto the gas inlet on the grill. Use an adjustable wrench to tighten it securely, but be careful not to over-tighten and risk damaging the threads.
Step 3: Check for Leaks
- Mix a solution of equal parts water and dish soap or use a gas leak detector solution.
- Apply the solution to the gas connections and observe for any bubbles forming, indicating a leak.
- If you notice any bubbles, turn off the gas supply immediately and tighten the connections further. Repeat the leak detection test until there are no bubbles.
Step 4: Turn on the Gas
- Ensure the gas shut-off valve is in the closed position.
- Slowly open the gas shut-off valve to allow gas to flow to the grill.
- Listen for the sound of gas flowing and check for any leaks using the leak detection solution.
Step 5: Test the Grill
- Turn on the burner knobs on the grill and ignite the burners according to the manufacturer’s instructions.
- Observe the flames to ensure they are blue and stable. If you notice any yellow or uneven flames, there may be an issue with the gas flow or burner alignment.
- Allow the grill to heat up for a few minutes and check for any unusual smells or signs of leaking gas.
Regular Maintenance and Additional Tips
Connecting the gas line to your grill is just the beginning. To ensure optimal performance and safety, here are some additional tips and maintenance practices you should follow:
- Regularly inspect and clean the burner tubes and other internal components of your grill to remove any debris or blockages.
- Check the gas supply line for signs of wear or damage periodically. Replace it if necessary.
- Always follow the manufacturer’s instructions for cleaning, maintenance, and storage of your grill.
- Keep the grill and gas connections protected from extreme weather conditions to prevent damage.
- Consider installing a gas pressure regulator if your grill doesn’t already have one. This helps regulate the gas flow and pressure for optimal performance.
Connecting the gas line to your grill might seem intimidating at first, but by following the steps outlined in this guide, you can do it safely and confidently. Remember to prioritize safety, gather the necessary tools, and perform regular maintenance to ensure smooth and enjoyable grilling experiences. Now, unleash your culinary creativity and savor the delicious flavors that only a well-connected gas grill can deliver!
How to connect Weber Genesis II Natural Gas Connection – DrB DIY
Frequently Asked Questions
How do I connect a gas line to my grill?
To connect a gas line to your grill, follow these steps:
What tools and materials do I need to connect a gas line to my grill?
Before starting the process, gather the following tools and materials:
Can I connect my grill to a natural gas line?
Yes, many grills can be converted to run on a natural gas line. However, it is important to consult the manufacturer’s instructions or a professional to ensure that your grill is compatible and properly converted.
Where should I position the gas line connection on my grill?
The gas line connection on your grill should be located in a convenient and accessible spot, typically on the bottom or back of the grill. Ensure that it is positioned securely and does not interfere with any moving parts or surfaces that can get hot.
Are there any safety precautions I should take when connecting the gas line?
Yes, safety precautions are essential when connecting a gas line to your grill. Here are some important steps to follow:
How do I test for gas leaks after connecting the grill to the gas line?
After connecting the gas line to your grill, it is crucial to check for any gas leaks. Follow these steps to perform a leak test:
Final Thoughts
Connecting a gas line to your grill is a straightforward process that can be done in just a few simple steps. First, ensure that your grill is compatible with a gas line connection. Next, gather the necessary tools, including an adjustable wrench and a gas line hose. Turn off the gas supply, and remove the cap from the gas line on your grill. Connect the gas line hose to the grill’s gas line fitting, tightening it securely with the adjustable wrench. Finally, turn on the gas supply and check for any leaks using a soapy water solution. By following these steps, you can easily and safely connect your gas line to your grill. So, if you’re wondering how to connect a gas line to your grill, simply follow these instructions for a seamless setup.

